Unleash your creativity with top video editing tools

Video editing has evolved tremendously in recent years, moving from professional studios to personal computers and mobile devices. One of the most powerful and user-friendly tools in this space is CapCut, a versatile video editing software that caters to both beginners and professionals. In this article, we’ll explore the various functions and advantages of CapCut, providing detailed steps on how to use its features to enhance your video projects.
Why Choose CapCut for Your Video Editing Needs?
CapCut offers a range of features that make it an excellent choice for video editing. Whether you are creating content for social media, producing a short film, or compiling a personal video, CapCut provides the tools you need to bring your vision to life.
User-Friendly Interface
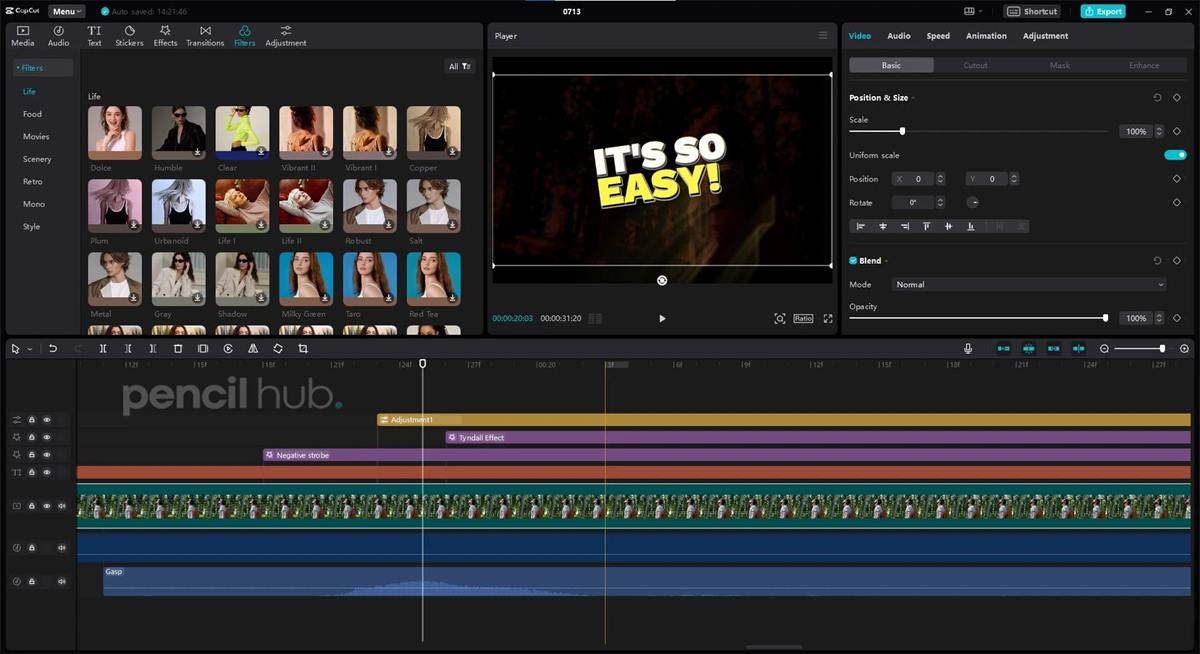
One of the standout features of CapCut is its user-friendly interface. The layout is intuitive, making it easy for users to navigate and find the tools they need. This is particularly beneficial for beginners who might be intimidated by more complex software.
Comprehensive Editing Tools
CapCut is equipped with a wide range of editing tools. You can trim, split, and merge clips, adjust the speed, and add transitions effortlessly. The software supports high-resolution videos, ensuring that your final product is of the highest quality.
Free Video Editing Software
CapCut stands out as a free video editing software that offers premium features without any hidden costs. Unlike many other tools that require subscriptions or one-time purchases, CapCut allows you to access all its features for free. This is a significant advantage for hobbyists and small creators who may not have the budget for expensive software.

Key Features of CapCut
CapCut’s features are designed to cater to a wide range of editing needs. Here are some of the key functions that make CapCut a powerful tool:
1. Video Effects and Filters
CapCut offers an extensive library of video effects and filters that can transform your footage. From cinematic effects to playful filters, you can enhance the visual appeal of your videos with just a few clicks.
Steps to Use Video Effects and Filters:
- Import Your Video: Start by importing your video into CapCut. Click ‘Import’ and select the video file from your device.
- Access the Effects Library: Click on the ‘Effects’ tab located on the left panel. You will see a variety of effects and filters categorized for easy navigation.
- Apply an Effect: Select the effect you want to apply by clicking on it. Drag and drop the effect onto your video timeline.
- Adjust the Effect: Customize the intensity and duration of the effect using the adjustment sliders. You can preview the changes in real-time.
- Save Your Changes: Once satisfied with the effect, click ‘Export’ to save your edited video..
2. AI Voice Changer
Another remarkable feature of CapCut is the AI voice changer. This tool allows you to modify the voice in your videos, providing a variety of voice effects that can add a unique touch to your content.
Steps to Use AI Voice Changer:
- Import Your Video: Import your video file into CapCut by clicking on the ‘Import’ button.
- Select the Audio Track: Click on the audio track of your video in the timeline to select it.
- Access the Voice Changer: Navigate to the ‘Audio’ tab and click on the ‘Voice Changer’ option.
- Choose a Voice Effect: Browse through the available voice effects and select the one you want to use. Options range from robotic voices to helium effects.
- Apply the Effect: Click ‘Apply’ to add the voice effect to your audio track. You can adjust the intensity of the effect using the sliders.
- Preview and Save: Preview your video to ensure the voice effect fits your content. If satisfied, click ‘Export’ to save your edited video.
3. Video Effects
CapCut’s video effects can significantly enhance the visual quality of your videos. Whether you want to add a vintage look, create a dreamy atmosphere, or emphasize certain parts of your video, CapCut’s effects library has you covered.

Steps to Apply Video Effects:
- Import Your Video: Import your video file into CapCut.
- Open Effects Library: Click on the ‘Effects’ tab to access the effects library.
- Select an Effect: Browse through the effects and select the one you want to use.
- Drag and Drop: Drag the effect onto your video timeline.
- Adjust and Customize: Use the adjustment sliders to customize the effect’s intensity and duration.
- Preview and Export: Preview the effect on your video. If you’re happy with the result, click ‘Export’ to save your video.
Conclusion
CapCut is a powerful video editing tool that offers a set of features to cater to both beginners and professionals. Its user-friendly interface, comprehensive editing tools, and advanced features make it a great choice for anyone looking to create high-quality videos. Whether you are looking to add stunning effects, change audio tracks with the AI voice changer, or utilize multi-layer editing, CapCut provides all the tools you need to bring your creativity to life.
By taking advantage of CapCut’s capabilities, you can produce professional-grade videos without any expensive software. Explore its features today and elevate your video editing projects to new heights.
Source:


